Overview
Dukemon is a desktop flashcard application used for memorising material in a fun and engaging way. The user operates the application through a CLI and runs on Java and the JavaFX framework. My main contribution to the team was the implementation of settings and the settings screen.
I realise that our application was going to be UI heavy as the way we planned our application involved a lot of screens. I took it upon myself to learn how the JavaFX framework worked and made a platform for the rest of my fellow developers to build their UI components on.
Summary of contributions
-
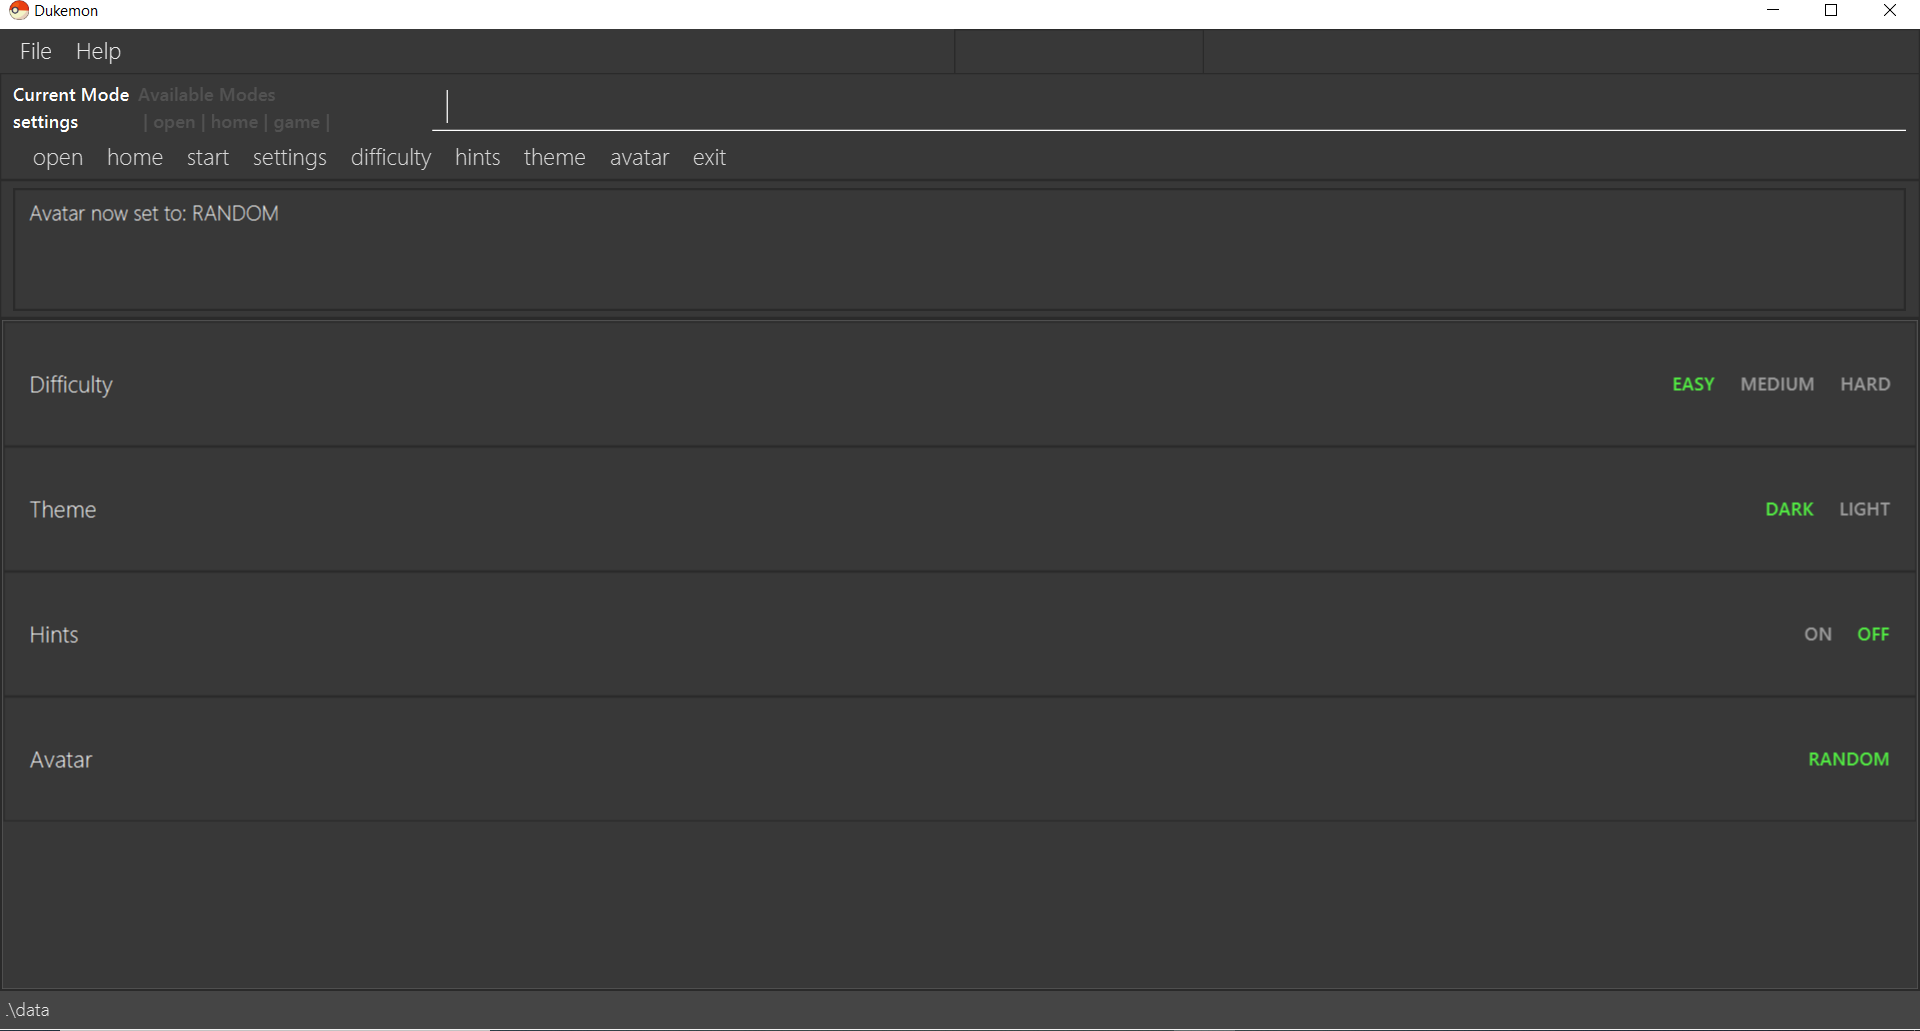
Major enhancement: added a settings page to the application.
-
What it does:
-
Allows the user to change specific settings about the application. Difficulty level, colour theme, hints and avatar are the features that are implemented in settings so far.
-
Difficulty: Allows the user to change the difficulty of the game in the application to one of three settings: Easy, Medium and Hard.
-
Theme: Allows the user to change to one of two themes: Dark and Light.
-
Hints: Allows the user to either enable hints to help them in the game or to disable them.
-
Avatar: Allows the user to set the avatar in the home screen based on the provided avatars' id number.
-
-
-
Justification:
-
This feature improves the product significantly because it provides options for the user to personalise their experience when using our application.
-
For example, weaker students may use the settings to set the difficulty to easy or medium.
-
Furthermore, some students might not want hints so as to practise what they have learnt. They can do that in the settings as well.
-
-
Highlights:
-
This enhancement creates a platform for other developers to add their own user settings into the application, allowing for increased extendability.
-
The process had to encroach on storage, logic as well as model and I learnt a lot integrating all the parts together.
-
-
Credits:
-
Minor enhancement:
-
Added a modular display to change screens depending on what mode the application is in.
-
This was a necessary enhancement due to how UI-heavy our application is. We needed multiple screens to handle multiple tasks and this was the solution I proposed and implemented.
-
-
Code contributed: [Functional code] [Test code]
-
Other contributions:
-
Project management:
-
Managed releases
v1.2-v1.4(3 releases) on GitHub
-
-
Enhancements to existing features:
-
Documentation:
-
Added diagrams to the implementation of settings in Developer’s Guide: #134
-
-
Community:
-
The label highlighting feature that I used for my settings page was also used by other classmates(1).
-
Contributions to the User Guide
Given below are sections I contributed to the User Guide. They showcase my ability to write documentation targeting end-users. |
Settings Commands 
(Available in Settings mode)
Goes into the settings menu.
Format: settings
Changing the theme: theme
Changes the theme of the UI.
Format: theme dark/light
Examples:
-
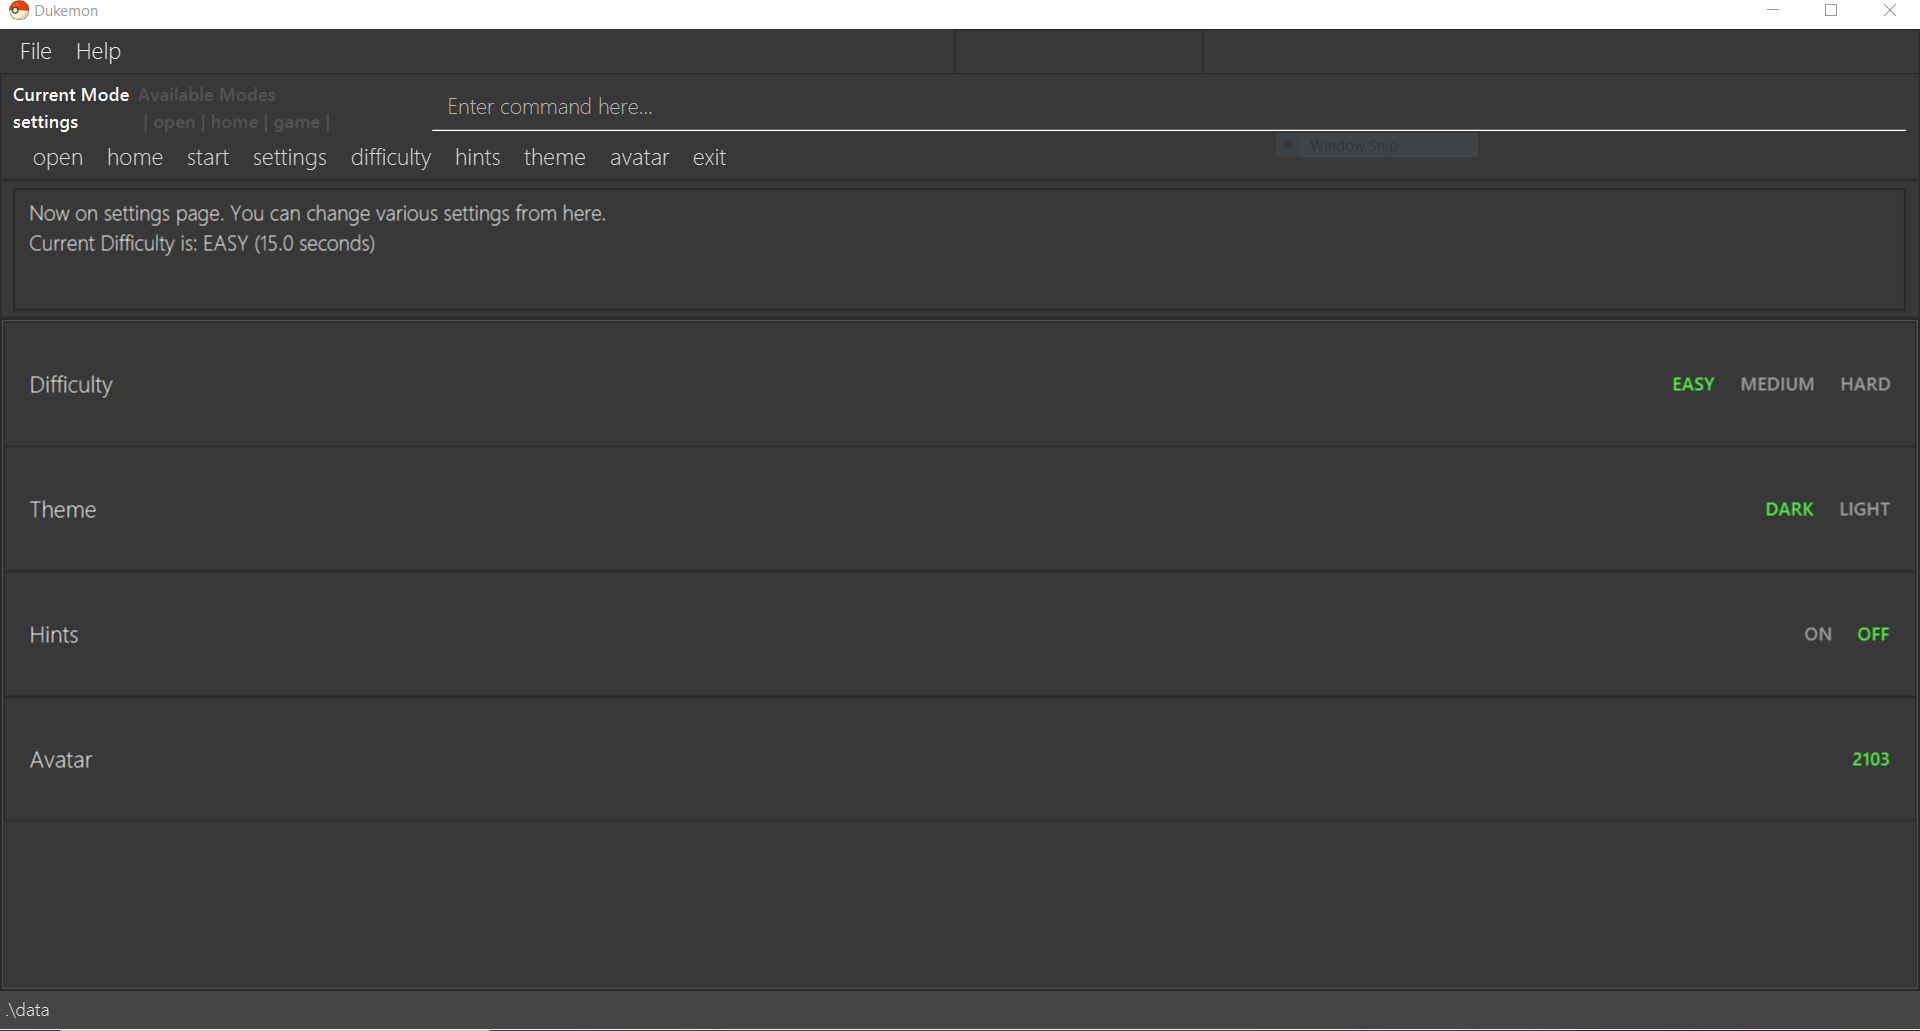
theme dark
Changes the UI theme to dark.
-
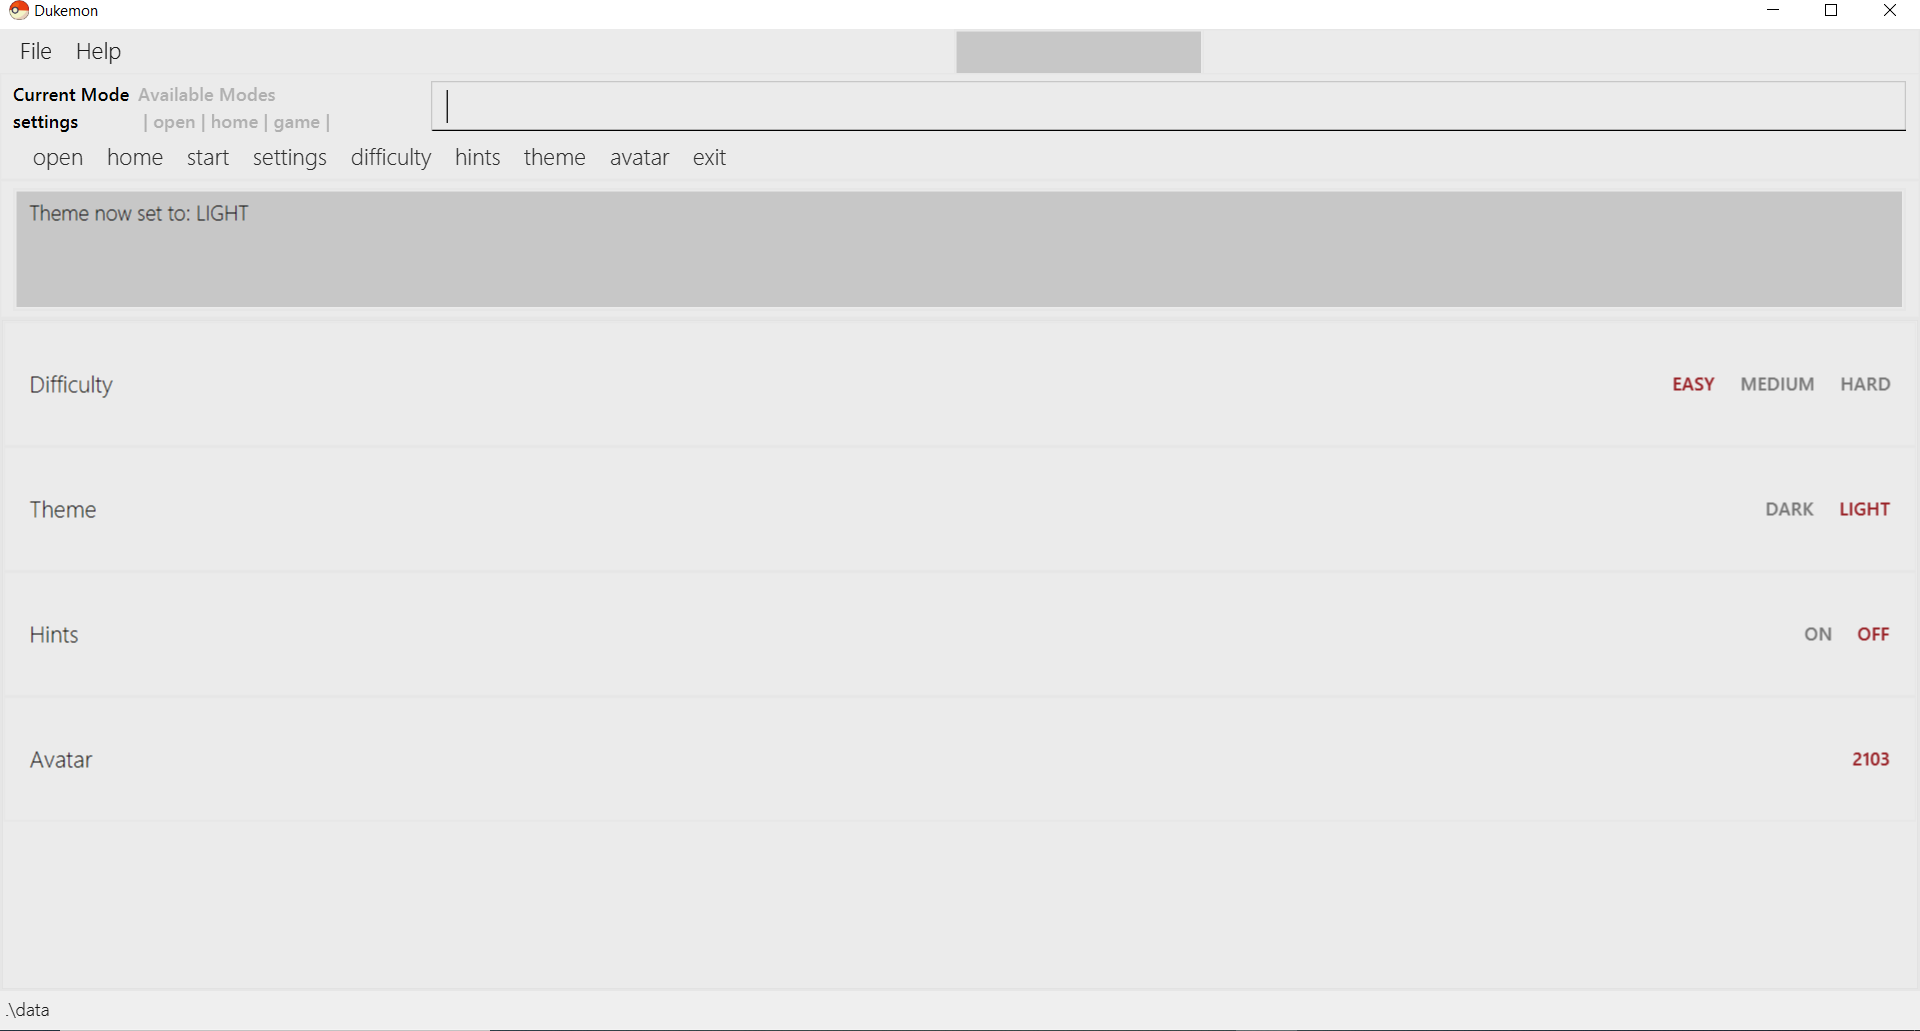
theme light
Changes the UI theme to light.
Turning hints on/off: hints
Turns hints on or off.
Format: hints on/off
Examples:
-
hints on
Turns hints on.

-
hints off
Turns hints off.

Changing difficulty: difficulty
Changes the difficulty of the game.
Format: difficulty easy/medium/hard
Examples:
-
difficulty easy
Changes the difficulty to easy. (Timer = 15 seconds)

-
difficulty medium
Changes the difficulty to medium. (Timer = 10 seconds)

-
difficulty hard
Changes the difficulty to hard. (Timer = 5 seconds)

Changing Avatar : avatar
Changes the avatar in the home screen. The avatar is one of the 151 original pokemon, so pick and choose! (There is a secret avatar as well. See if you can find it!)
Format: avatar [0 - 151]
avatar 0 sets the avatars to random.
Examples:
-
avatar 0
Changes the avatar to a random one everytime a new command is called. -
avatar 1
Changes the avatar to 001 in the original Pokedex, which is Bulbasaur.
-
avatar 151
Changes the avatar to 151 in the original Pokedex, which is Mew.
Contributions to the Developer Guide
Given below are sections I contributed to the Developer Guide. They showcase my ability to write technical documentation and the technical depth of my contributions to the project. |
Settings Feature
Implementation
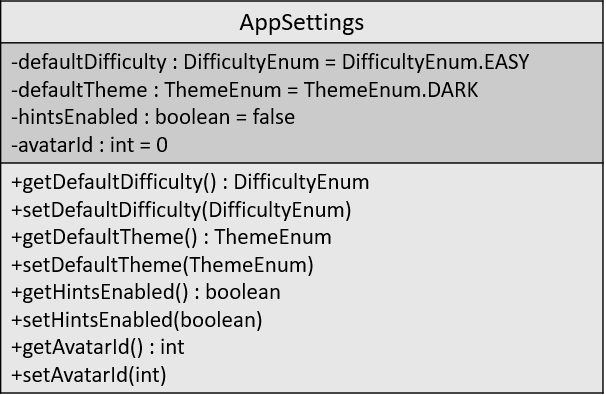
AppSettings is a class that was created to be integrated into the Model of the app. It currently contains these functionalities:
-
difficulty [EASY/MEDIUM/HARD]to change the difficulty of the game. -
hints [ON/OFF]to turn hints on or off. -
theme [DARK/LIGHT]to change the theme of the app. Currently only supporting dark and light themes.
This feature provides the user an interface to make their own changes to the state of the machine. The settings set by the user will also be saved to a .json file under data/appsettings.json.
The activity diagram below summarizes what happens in the execution of a settings command:
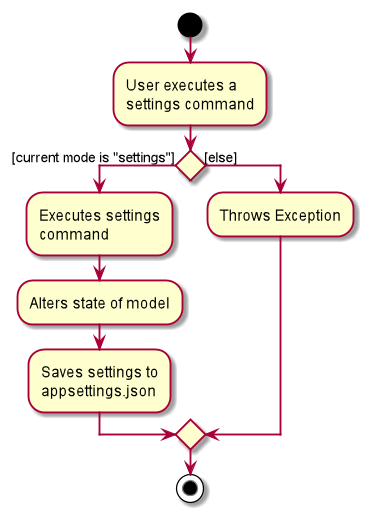
| Take note that "mode" as defined in our project is the state in which the application is able to take commands specific to that mode. |
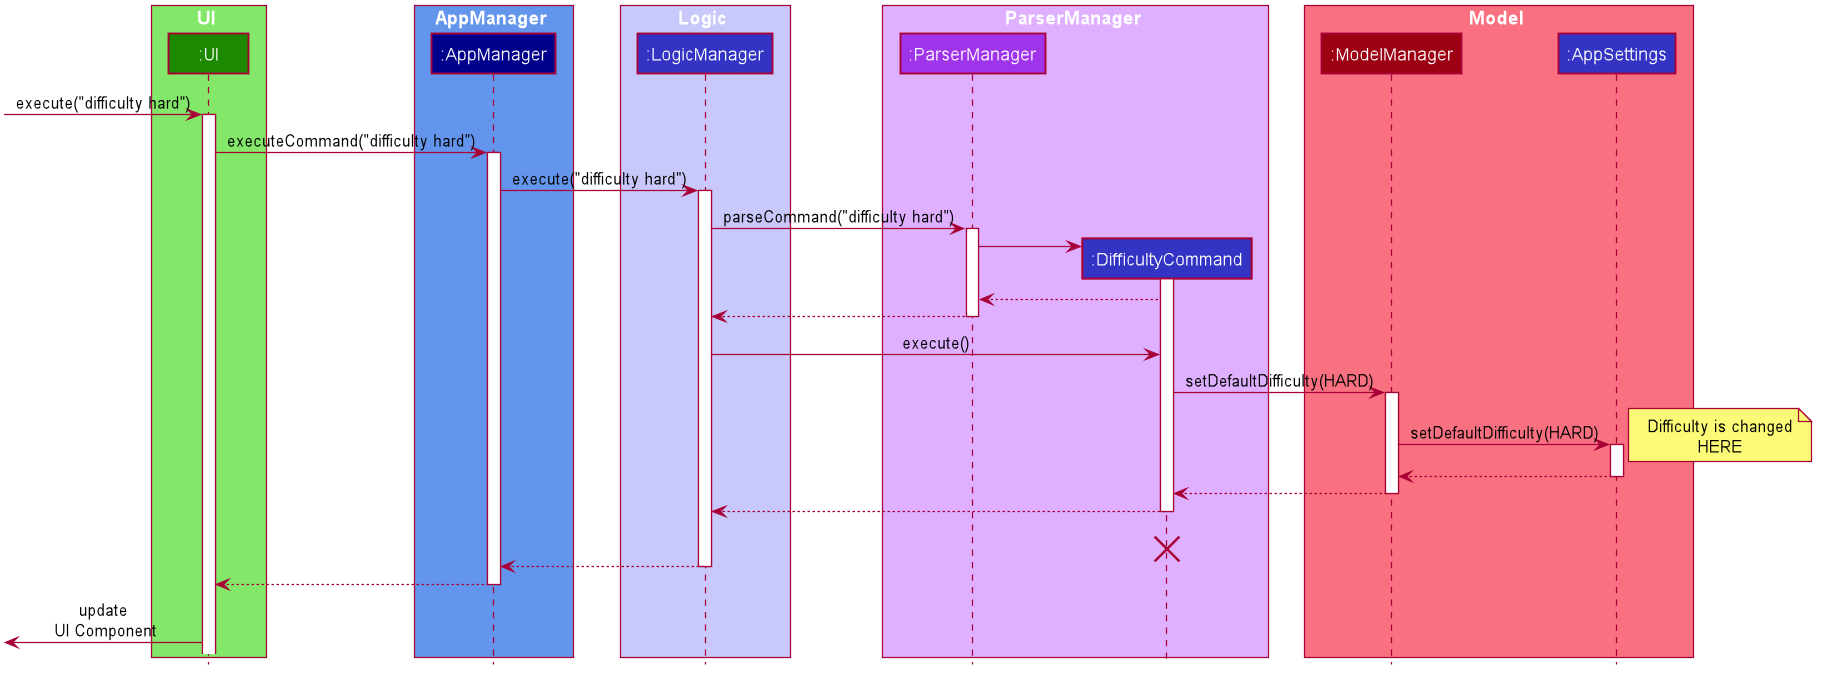
Given below is a step by step walk-through of what happens when a user executes a difficulty command while in settings mode:
Step 1:
Let us assume that the current difficulty of the application is "EASY". The object diagram above shows the current state of AppSettings.

Step 2:
When the user enters difficulty hard, the command gets passed into Ui first, which executes AppManager#execute(), which passes straight to LogicManager#execute() without any logic conditions to determine its execution path.

Step 3:
At LogicManager#execute() however, the command gets passed into a parser manager which filters out the DifficultyCommand as a non-switch command and it creates a DifficultyCommand to be executed.

Step 4:
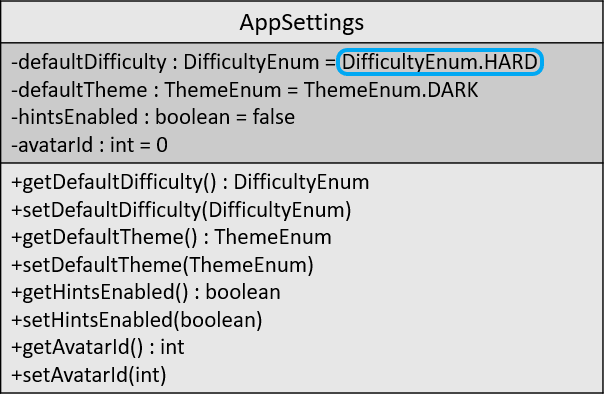
Upon execution of the DifficultyCommand, the state of the model is changed such that the DifficultyEnum in AppSettings is now set to HARD.
Step 5:
Since the main function of the difficulty command is accomplished and all that is left is to update the ui, the CommandResult that is produced by the execution of the command goes back to Ui without much problem.
Step 6:
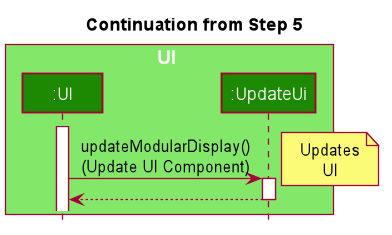
Assuming that there were no errors thrown during the execution of the difficulty command, the execution calls updateModularDisplay in UpdateUi. In here, the ModeEnum.SETTINGS is registered and it updates the settings display to properly reflect the change in difficulty.
The state of appSettings is then as follows:
Design Considerations
There were a few considerations for implementing an interface that essentially allows users to touch a lot of parts of the application through settings and some of these methods break software design principles. These are the considerations we came across:
Alternative 1 |
Alternative 2 |
|
Aspect 1: |
Effecting the change inside the |
Effecting the change in the part of the architecture that the setting is affecting. E.g, Changing the theme inside Ui or changing the difficulty inside model |
Why did we choose Alternative 2: |
||
Aspect 2: |
Storing it inside the enumerations that make up the choices for the settings |
Storing it inside the classes that implement the settings |
Why did we choose Alternative 1: |
||